Friday, December 26, 2014

Digi Stamps, Digikits & Craft Artist, Oh My!

Little Laura in the English Town digikit.
I've been working with the many wonderful digikits put out by Daisy Trail to use with the Craft Artist 2 program. The background of the card above was made with parts from the English Town Digikit. My digital stamp Little Laura is in the foreground. She is colored in Prismacolor Pencils and then I went over each color with Gumsol.
This is Little Laura, available for your use.

First I draw the figure on drawing paper and work out the dimensions and try to get the right proportions in the figure. Then I go over the drawing with a fine line marker. After that I put the image on my light box and trace the drawing again in pencil on card stock, adding her clothing and erasing the unneeded lines. After that I go over all the lines on the image with a 01 fine line marker. Since I have had problems with the images before this one showing up totally in the Craft Artist program, I went over the part that had the problem and used the 03 thicker fine line marker on Little Laura's legs. The cut studio in the Craft Artist program had no problem working with Little Laura!

I did mention that I worked on other images, so I will show you my other cards and give you the colored images for your own use. All I ask is that you let me know where I can see your work with my image and give me credit for my work on my image.

Laura in English Town digikit.
Laura digi stamp
My Katie digi stamp in the garden of the English Town digikit.
Katie digi stamp
Laura digi stamp on the beach in Summer Seaside digikit.
Laura digi stamp
Have fun, I did...let me know how you are doing.


Friday, December 19, 2014

More New Digital Stamps by Carla

My friend Sue Peck introduced Ian, my very first digital stamp! The background is a couple of images (merged) by Zoe at Make it Crafty. Ian and the backgrounds are printed onto neenah paper, colored with Promarkers and Spectrum Noir Pencils. You can find wonderful work by Sue at the following address: http://applejackcardsbysue.blogspot.co.uk/2014/12/presenting-ian.html

I'm still working on my new digi stamps, but I feel I am getting better with each one.After drawing my images in pencil, I use a Pigma  Micron 01 to darken the lines. Then I scan them into my computer and save them as line drawings and print one to color. I use Prismacolor Pencils and then go over the colors with Gamsol (I don't go over the skin tones).


Here are my Laura digi stamps for you to play with free of charge. All I ask is to let me know where I can see your work and to give me credit for the drawing.


Enjoy and let me know what you think of my latest work. Next time I will have project or two to share with you using these digital stamps.

Sunday, December 14, 2014

My Personal Digital Stamps


Ever since I discovered digital stamps by talented artists such as Maurie Manning, Cheryl Grant and Rick St. Dennis and began creating cards with them, I've wanted to learn to design my own. But I keep discovering more wonderful artists and buying more digi stamps, so I've enmassed a very large collection. 
 
It's time to try my hand at my own creations so, I bought a couple of books to get me started. I like the detailed Manga style, originally created by Japanese artists. The books I am using as my guides are “Drawing Manga” by Jeannie Lee and “Manga for the Beginner” by Christopher Hart. I found that basic the Manga body is actually about the same proportions as figure drawing in general. Of course there are ages and heights to be considered which can change the basic build considerably.
Here are my very first attempts at drawing a preteen boy and girl. Please feel free to take them and use them, but let me know where I can see them and please give me credit for the line drawings. I hope you enjoy Ian and Katie!

Come back again to see what I will create next!

Thursday, December 4, 2014

Handmade Holiday Cards Part 2


The holidays are a great time to get creative. For this card I used the Christmas tree stamp from Stampabilities #OR1059 and Hero Arts stamp H5267 Santa. It was colored using Tombow Water Color Markers and metallic Gelly Roll pens. I gave the card depth by using foam dimensional on the back of Santa.
Instructions:
Glue scrapbook printed paper to the front of a 5” x 6.5” card base.
Stamp tree on watercolor paper using jet black, Stazon Solvent Ink.
Use Tombow Watercolor Markers to color green areas, followed by red on the ribbons and bows. I use a waterbrush to drag color on the ribbons.
Color ornaments in assorted colors.
Use Metalic Gelly Roll pens for the star and some embellishments of ornaments.
Cut out tree leaving a white edge around the tree and gifts.
Glue tree to the print paper on the upper left.


 Print and color Santa on watercolor paper.
Cut out Santa leaving a white edge.
Add red glitter to hat and stockings.
Place foam dimensionals on the back and adhere to the card.

Wednesday, November 26, 2014

Handmade Holiday Cards Part 1


I appreciate any chance I get to be creative. The holidays in December give me that opportunity. This will be the first of several posts on my blog to show the ways to vary the cards you make beginning with one Christmas tree stamp from Stampabilities #OR1059.

Instructions:
Stamp tree on watercolor paper, using jet black, Stazon solvent ink.
Use Tombow Watercolor Markers to color green areas, followed by red (you can use a waterbrush to blend the ribbon) on the ribbons and bows.
Color ornaments in assorted colors.
Use metallic Gelly Roll [en for the star and some embellishments of ornaments.
Cut out tree leaving a white edge (I didn’t use the gifts at the bottom of the stamped tree).
Glue tree to holiday print card base (I used Recollections 5.5 in. x 4.25 in. cards).
Add holiday stickers for interest both as ornaments and gifts.
Check my next blog for another card using this great stamp!

Saturday, November 8, 2014

Easy Step-up Cards with Sizzix


I have admired step cards and have been wanting to find an easy way to create them. I recently got the Sizzix Framelits Die Set of 23 piece by Stephanie Barnard. This wafer-thin chemical-etched die set is fairly easy and efficient to use.
At first I used the piece in my Cuttlebug without extended cutting pads. I needed to clean the pieces up with my scissor and make folds by. They weren't perfect, but I did love the creations and wanted to make more and want to make them right. I went to Michaels and bought the extended cutting pads (B plates) as well as the adapter (C plate)! It's much easier and neater with the extended pads to make the card base. I use light tact tape to hold the paper to the framelite and put the base through the machine twice...flipping the piece once between the pads to make neat cuts and better embossed impressions for the folds.

The kit come with a handy storage envelope, needed to keep the many pieces together and the set it compatible with several machines.

The stack or sandwich for the Cuttlebug from bottom to top is as follows:

A spacer
C adapter
Die blades facing up
Paper
B cutting pad

Yes, the new long pad gets cuts and is tough to turn at the beginning...slow and even pressure is needed to turn the Cuttlebug and placement beyond the border line is recommended.
Here is my take on the original picture as shown in the detailed description:
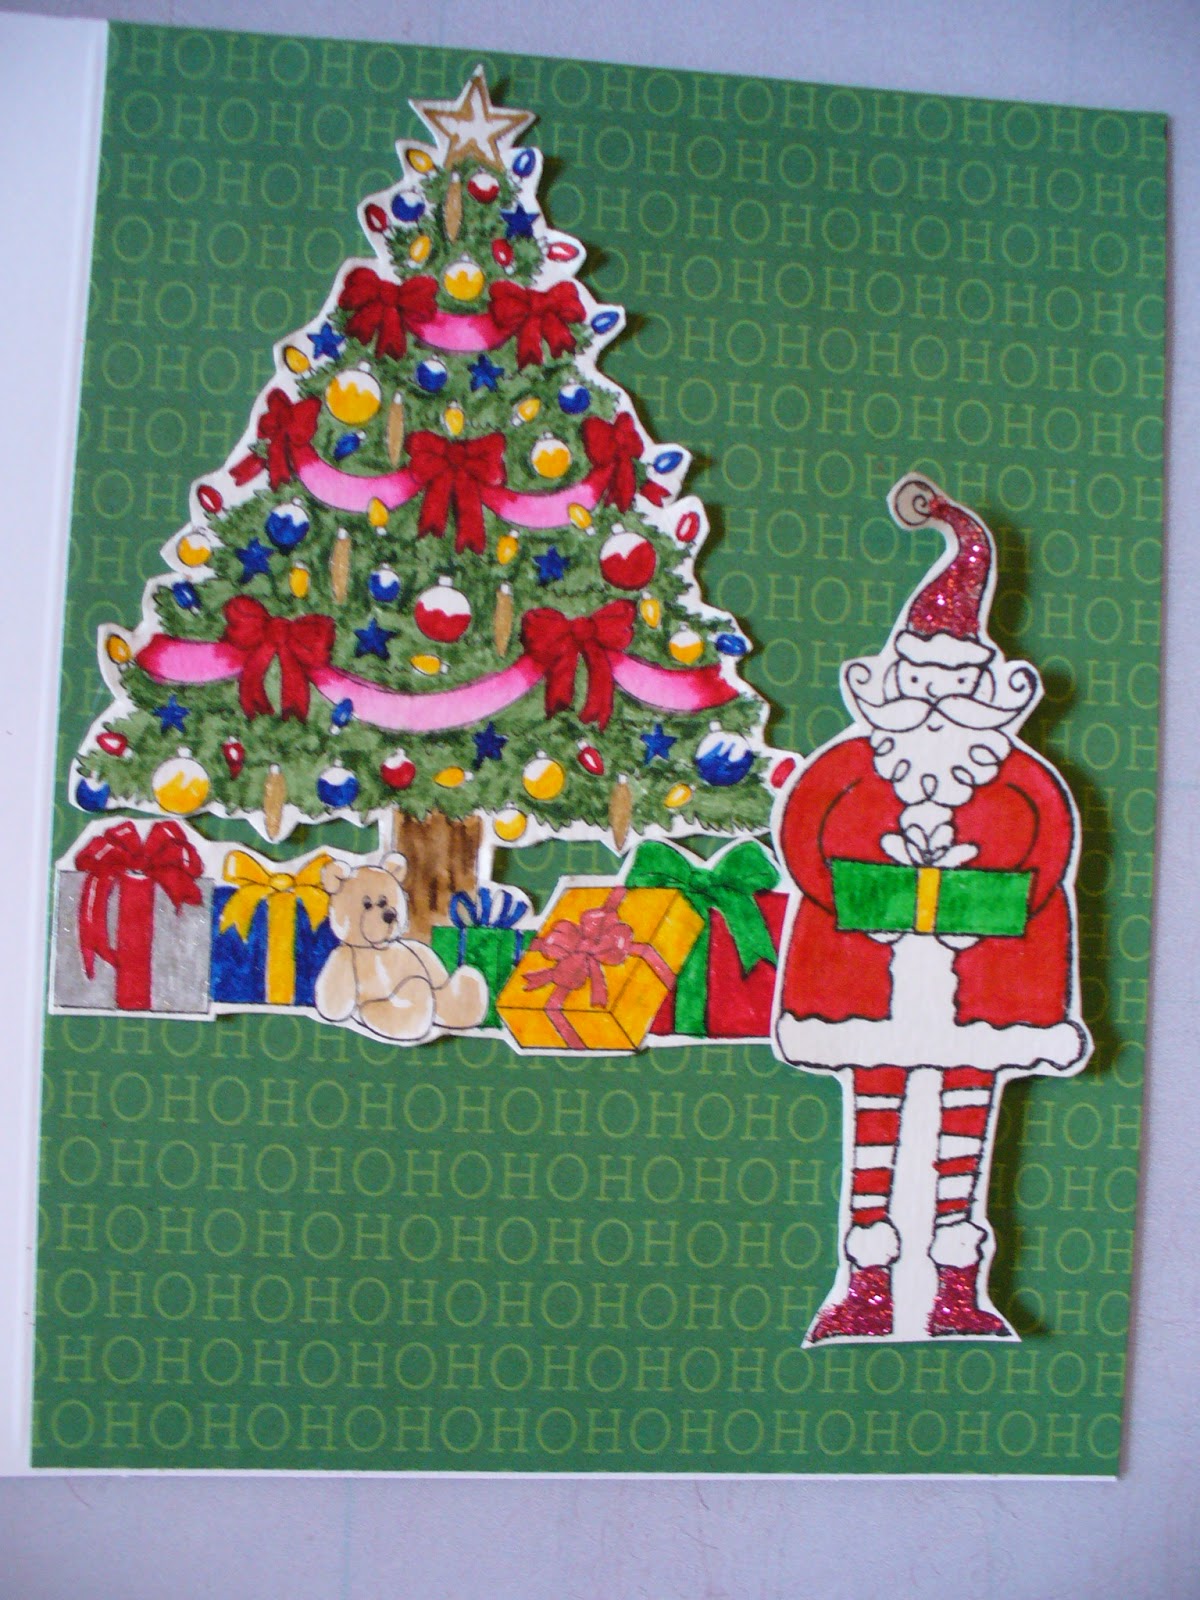
Of course I didn't just by the set to continue to make balloon birthday cards. I like to make little scenic cards using some rubber stamped pieces which I had previously colored. The first two of the following cards were made before I got the cutting pads and if you were to check them, the backs are not the same as the later cards, but they are so very cute anyway!


I used assorted Magnolia rubber stamps and Art Impression stamps as well as the Cricut Expression and the Sizzix dies and Cuttlebug machine to illustrate this blog post. I hope you enjoyed this story and try this new item yourself.
For additional information on the designer of these dies check this out: http://stephaniebarnard.blogspot.com/

Sunday, October 12, 2014

Prismacolor Pencils or Faber-Castell Polychromos

Image by Rick St. Dennis, scene by My Craft Studio, put together in Craft artist 2 by Carla Brooke
After enjoying Prismacolor pencils, but putting up with the broken leads and wax bloom, I tried a new pencil and I'm loving it! I believe the Faber-Castell Polychromos have a richer pigment and blend better than the Prismacolor and there is no need for the gumso or mineral spirits. These vibrant pencils are break resistant, waterproof, non-smudge and match the company's other color lines. The pencils have a creamy texture and the color saturation is wonderful. They are easy to use, blend well and even erase. They are excellent for coloring, very smooth and accurate. I love the ability to mix color and create my own shades.  I have also used my Prismacolor pencils for a color I don't have in the Polychromos. Prismacolor pencils are wax based and Polychromos are oil based.

I only have the set 24 and would enjoy owning the whole 120 pencil set! I plan to fill in with single pencils ordered in the future, from Dick Blick. My set came from a company on Amazon.com.

The card at the top, the image of the girl and the toys around her was color with Faber-Castell Polychromos and just a bit with Prismacolor for the colors I currently do not have.


Come back to my blog to see the next pieces done using Polychromos!


Friday, October 3, 2014

Holiday Lamppost Card

Ever since I first spotted the Sizzix Holiday Lamppost die, I've wanted to buy it and design a card around it. Finally, I ordered it from my favorite scrapbook store. Of course due to the holly leaf on the front of the lamppost the December holiday cards are a natural for its' use. Without their addition a scenic would work well too.

I used it for an unusual holiday card, with the addition of a tinted piece of filler plastic for the lighted area.
Supplies:

Cuddlebug Machine
Jim Holtz Alterations Sizzix Bigz Die - Holiday Lamppost 657469
D'vine Swirl embossing folder
Impression Obsession cover a card brick stamp
Tinted sheet plastic
White cardstock
Black cardstock\
Green cardstock
Red cardstock
Stazon Brown solvent ink pad
Red pigment ink pad
Zip two way glue
3 in 1 Beacon advanced craft glue
140 lb.watercolor paper
Foam demensionals
Scissor
Large and small acrylic blocks
Small Xmas sentiment stamp
Card base


Cut lamppost with Cuttlebug machine.

Glue parts to lamppost.

Trim plastic for light.

Cut dimensionals to size and secure.

Ink stamp with brown

Rub watercolor paper onto large stamp and pickup ink.

Stamped leaving white area for paper snow.
Put embossing folder through Cuddlebug for snow design.

Hand rip embossed paper for the look of snow.


Glue paper snow in place.
Stamp small piece of cardstock with sentiment and rub ink on edges of cardstock.
Glue sentiment

Ready to glue to card base.

Finished set of 4 cards.