Here's my card using My Besties Adorable Pets Img 1122 digi stamp. I colored this sweet stamp using Copic Markers.
I
placed the colored digi stamp in the Craft Artist Program, where I
combined it with elements from the Craft Scapes Winter
Village Digikit.
Check the following links for more wonderful images:
http://www.mybestiesshop.com/store/c1/Featured_Products.html
https://www.etsy.com/shop/SherriBaldy
Challenges:
https://worldwideopendesignteamchallenge.blogspot.com/2020/01/world-wide-open-design-team-challenge.html
http://angiesdigitalstamps.blogspot.com/2020/01/welcome-to-ch-38-agno-twist-our-first.html
https://creativecraftcottage.blogspot.com/2020/01/challenge-125-anything-goes.html
Thursday, January 30, 2020
Friday, January 17, 2020
Flower With Background Mini Canvas
Here's
another mini canvas with a new attempt at an alcohol floral painting.
The canvas is covered with white acrylic paint. I let it dry.
I
spread Alcohol Blending Solution on the canvas. I
put three dots of color and solution on a rectangular felt applicator
and pressed it into the canvas. I sprayed it lightly with canned air.
I
followed that with a circular felt applicator and using a circular motion pressed it into
the canvas and sprayed it with canned air. I let the canvas dry for a
few days.
I
tried for a flower shape over the background print on the canvas. I
dropped dots of red ink and blew each one with the canned air
lightly.
I
placed a bit of orange alcohol ink on a palette and picked it up with a
small paint brush, dotting the center of the floral form until it
had a bumpy shape in the middle something like a floral stigma.
Knowing that I had trouble (not enough strength in my fingers) spraying my last floral canvas with Kamar and Gloss Spray with UV, I asked my husband to spray the first can of Kamar 3 times with at 30 minute intervals. I waited a day and then my husband sprayed the can of Gloss once. Kamar actually brought out the colors nicely!
Challenges:
https://avenue613.blogspot.com/2020/01/challenge-229-anything-goes-woptional.html
https://worldwideopendesignteamchallenge.blogspot.com/2020/01/world-wide-open-design-team-challenge.html
http://angiesdigitalstamps.blogspot.com/2020/01/welcome-to-ch-38-agno-twist-our-first.html
Challenges:
https://avenue613.blogspot.com/2020/01/challenge-229-anything-goes-woptional.html
https://worldwideopendesignteamchallenge.blogspot.com/2020/01/world-wide-open-design-team-challenge.html
http://angiesdigitalstamps.blogspot.com/2020/01/welcome-to-ch-38-agno-twist-our-first.html
Winter in the City Card
Here's my card using Daisy Do All Winter Wonderland digi stamp. I colored this sweet stamp using Copic Markers.
I placed the colored digi stamp in the Craft Artist Program, where I combined it with elements from the Craft Scapes Manhattan Winter Digikit.
Check the following links for more wonderful images:
http://www.mybestiesshop.com/store/c1/Featured_Products.html
https://www.etsy.com/shop/SherriBaldy
Challenges:
https://worldwideopendesignteamchallenge.blogspot.com/2020/01/world-wide-open-design-team-challenge.html
http://angiesdigitalstamps.blogspot.com/2020/01/welcome-to-ch-38-agno-twist-our-first.html
http://craftysentiments.blogspot.com/2020/01/anything-goes-challenge_14.html
Monday, January 13, 2020
Alcohol Flower Canvas
I couldn't wait to post this! This was so fun! I covered another mini
canvas with white acrylic paint to prime it. I dropped alcohol blending
solution on the canvas and then 3 colors of alcohol ink and added more
blending solution. I let it dry and sprayed the usual Krylon Kamar
Varnish and then Krylon Gloss spray with UV. I did a couple of passes of
each letting it dry between passes. Well on my last pass over the
canvas, I got carried away an sprayed the gloss too close and too much.
But I love what happened, the ink got wet and moved! Kamar Varnish is
supposed to keep the inks in place! I don't know if you can see them, I
see flowers!
Challenges:
https://avenue613.blogspot.com/2020/01/challenge-229-anything-goes-woptional.html
https://creativecraftcottage.blogspot.com/2020/01/challenge-125-anything-goes.html
https://morgansartworld.blogspot.com/2020/01/morgans-artworld-challenge-1.html
Challenges:
https://avenue613.blogspot.com/2020/01/challenge-229-anything-goes-woptional.html
https://creativecraftcottage.blogspot.com/2020/01/challenge-125-anything-goes.html
https://morgansartworld.blogspot.com/2020/01/morgans-artworld-challenge-1.html
Mixed Media Madness Canvas
I am continuing my alcohol ink journey. Here I have an old mini
canvas that had a collage of numerous mix media supplies on it including
gesso, gel medium and glass bead glitter.
I painted over the canvas with white acrylic paint and after it dried I played with alcohol ink and blending solution over the top.
After the canvas dried I sprayed Krylon Kamar Varnish and then a day or so later I sprayed Krylon gloss spray with UV.
I painted over the canvas with white acrylic paint and after it dried I played with alcohol ink and blending solution over the top.
After the canvas dried I sprayed Krylon Kamar Varnish and then a day or so later I sprayed Krylon gloss spray with UV.
I think it's pretty cool, what do you think?
Challenges:
https://moremixedmediachallenge.blogspot.com/2020/01/more-mixed-media-challenge-anything.html?
https://avenue613.blogspot.com/2020/01/challenge-229-anything-goes-woptional.html
https://creativecraftcottage.blogspot.com/2020/01/challenge-125-anything-goes.html#
https://morgansartworld.blogspot.com/2020/01/morgans-artworld-challenge-1.html
Saturday, January 11, 2020
Alcohol Ink Fun Part 3

Here I am using my second alcohol inked Yupo paper to transfer a stamped image to another surface leaving a ghost image.
I used Lift-Ink on a clean butterfly stamp and stamped directly over the alcohol inked paper. I cut out the butterfly that was stamped on the inked paper.
The Lift-Ink lifted the colors from the paper. Then I stamped on a white card stock transfering the butterfly now colored onto the white paper.
To reveal the ghost image I waited a short time. Then I gently dabbed a clean paper towel to buff the surface removing the residual ink. Dabbing gently is important, my first try came out blurry. Do not rush the process! That's why the design is smaller and there are two butterflies instead of one to cut out! I messed up at first and tried again..no problem I love what I came up with! It's a smaller card than I planned, but no less lovely!
I enjoyed bringing these posts to you, come back and see what I do next time!
Thursday, January 9, 2020
Alcohol Ink Fun Part 2
I worked Ranger Alcohol Lift-Ink (refill bottle) on a dauber into the foam dauber top on my mat.
I chose to rub out some of the stencil flower with the Lift-Ink dauber.
I removed the stencil and rubbed the paper with a soft paper towel.
Now you can see the ghost flower peeking thru the flower garden. I added a purple butterfly stamp in Stazon ink for added interest. I finished off this design with a frame card and added purple butterflies to bring out the color in the alcohol ink design.
Tuesday, January 7, 2020
Fun With Alcohol Inks and Alcohol Blending Solution
I love playing with my alcohol inks and experimenting on Yupo Paper (a smooth, synthetic surface that resists buckling and dries quickly).
For this experiment I used:
Ranger Alcohol Inks:
Botanical, Amethyst and Watermelon
Adirondack Alcohol Blending Solution
Canned Air
Applicator with felt attached
I cut a 5x7" sheet of Yupo Paper in half and spread the Alcohol Blending Solution on one half. I placed a dot of each color on the felt and added a dot or two of the blending solution. I pressed the applicator down all over the wet paper and followed that with light sprays of canned air. I loaded the applicator and again and pressed it all over the paper. I ended with the canned air.
Without changing the felt for a fresh one, I followed the same routine on the second half of the paper.
I loved the muddied look of the second paper contrasting the light almost garden look of the first paper.
Come back again to find out what I do with these to inked papers.
Saturday, January 4, 2020
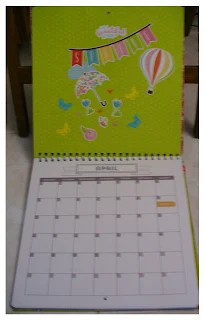
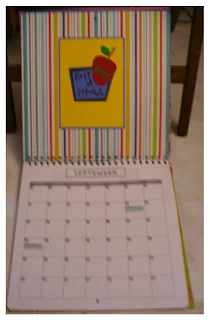
Cinch Calendar for 2020
This calendar was the perfect Christmas gift for my son to use in his new office. Each page was a new challenge to design one of twelve months. I used both printed paper and card stock and stickers too. I made die cuts using my Cricut Machine and the Cuttlebug Machine.
It took sometime to finish, along with a mistake or two, but I love the final resulting calendar.
Challenges:
http://pearlysparkleschallenge.blogspot.com/2020/01/challenge-47-anything-goes.html
https://classicdesignchallenge.blogspot.com/2019/12/classic-design-challenge-january-1.html?m=1
http://abitmoretimetocraft.blogspot.com/2020/01/a-bit-more-time-to-craft-challenge-107.html
https://worldwideopendesignteamchallenge.blogspot.com/2019/12/world-wide-open-design-team-challenge.html
https://morgansartworld.blogspot.com/2020/01/morgans-artworld-challenge-1.html
Thursday, January 2, 2020
Tile Coasters and More Tile Coasters!
 | ||
| Glossy tiles colored with three colors of Sharpie Markers and then drops of rubbing alcohol |
My friend suggested I use the remaining tumbled tiles in my stash, to play with alcohol inks. They aren't the glossy white like what I used with the Sharpies. Not only did I have these tiles but I have a collection of small bottles of alcohol inks (mostly unused). I applied Alcohol Blending Solution on the tiles using an applicator and then dropped Ranger Adirondack Alcohol Inks on them. I watched as the drops moved from the alcohol and was amazed at the lovely abstract designs.
 | ||||
|
Challenges:
http://pearlysparkleschallenge.blogspot.com/2020/01/challenge-47-anything-goes.html
https://avenue613.blogspot.com/2019/12/challenge-228-anything-goes-woptional.html
https://classicdesignchallenge.blogspot.com/2019/12/classic-design-challenge-january-1.html?m=1
Subscribe to:
Posts (Atom)


