Showing posts with label card stock. Show all posts

Friday, March 15, 2013

Gatefold Cards for All Types of Occasions

I wanted to make use of my many scraps of card stock and printed paper. I also wanted to make a different type of card. Gate cards filled the bill!


A gate card is a bit different from basic cards. Instead of having a single fold, a gatefold card has two folds, each forming a flap that meets in the center on the front of the card. In addition to decorating the two cover panels and the inside of the card, sometimes a closure or overlapping panel is created to sit on the front of the card to hold the two cover flaps together.

This type of card is versatile and can be used for many occasions.

Here are two different versions of the gatefold cards, one is 5 1/2" square and the other is a 4" x 5" card.

Let look into the larger square card (fits a 5 1/2" envelope):


Cut card stock 5 1/2" x 11" and score 2 3/4" from each end. Fold ends to meet at the middle.
Cut 2 outer panels of printed paper or card stock at 2 1/4" x 5" and select or create a piece for the top closure. For this card I chose one of the many square designed in the Graphic 45 collection of Song Bird.

Each of my paper cuts were inked on the edge, so as not to show any white but also to give them a bit of vintage look.

For the center area inside the card to write on, I used a printed paper for the base cut at 4" x 4 3/4" and the white for writing on is cut at 3 3/4" x 4 1/2" and adhered to the center of the printed paper and that in turn is glued to the center panel of the card inside.
In my last post, I talked about the stickers and pens used with Starforms...here is an example in this square format:
In the following card, I used a Starform fan shape as the center closure at the front of the card:
For the smaller 4" x 5" gatefold card (fits a normal A2 envelope):


Cut card stock 8" x 5" and score at 2" from each end. Fold ends to meet at the middle.

Cut 2 outer panels of printed paper or card stock (I used Graphic 45 Song Bird) at 4 3/4" x 1 3/4" and select or create a piece for the top closure. For this card I chose one of the many square designed in the Graphic 45 collection of Song Bird.

Again each of my paper cuts were inked on the edge, so as not to show any white but also to give them a bit of vintage look.

For the center area inside the card to write on, I used a printed paper for the base cut at 4 1/2" x 3 1/2" and the white for writing on is cut at 3" x 4" and adhered to the center of the printed paper and that in turn is glued to the center panel of the card inside.

I love all the different looks that can be achieved with this style of card!


Saturday, January 5, 2013

Try'folds Lakehouse Card


 I love these cling stamps from Art Impressions!  These like last week's are from the Try'Folds Series. They  are specially designed so that you can easily create a layered tri-folding cards. Instructions are included so you know exactly how to line up the images and create a lovely finished design. There are 7 different sets. This package contains Lakehouse TF-UM4204: a set of four cling rubber stamps in a 10x4-1/2 inch package.

I used cardstock, score board and bone folder, Stazon ink, watercolor pencils, waterbrush and scissors. Here, I am displaying what each of the stamps looks like colored, but for directions follow the ones on the package, they are great!


I have more to show you next week, of these very neat try-fold cards !


Try-Fold Cottage Cards


I found some new cling stamps at Art Impressions to play with and I love them!  These are from the  Try'Folds Series. These clever sets of rubber stamps are specially designed so that you can easily create a layered tri-folding cards. Instructions are included so you know exactly how to line up the images and create a lovely finished design. There are 7 different sets. This package contains Cottage TF-UM4202: a set of four cling rubber stamps in a 10x4-1/2 inch package.

I used cardstock, score board and bone folder, Stazon ink, watercolor pencils, waterbrush and scissors. Here, I am illustrating the steps, but for directions follow the ones on the package, they are great!


In the next week or more I will show examples of others in this fun set!

Saturday, December 8, 2012

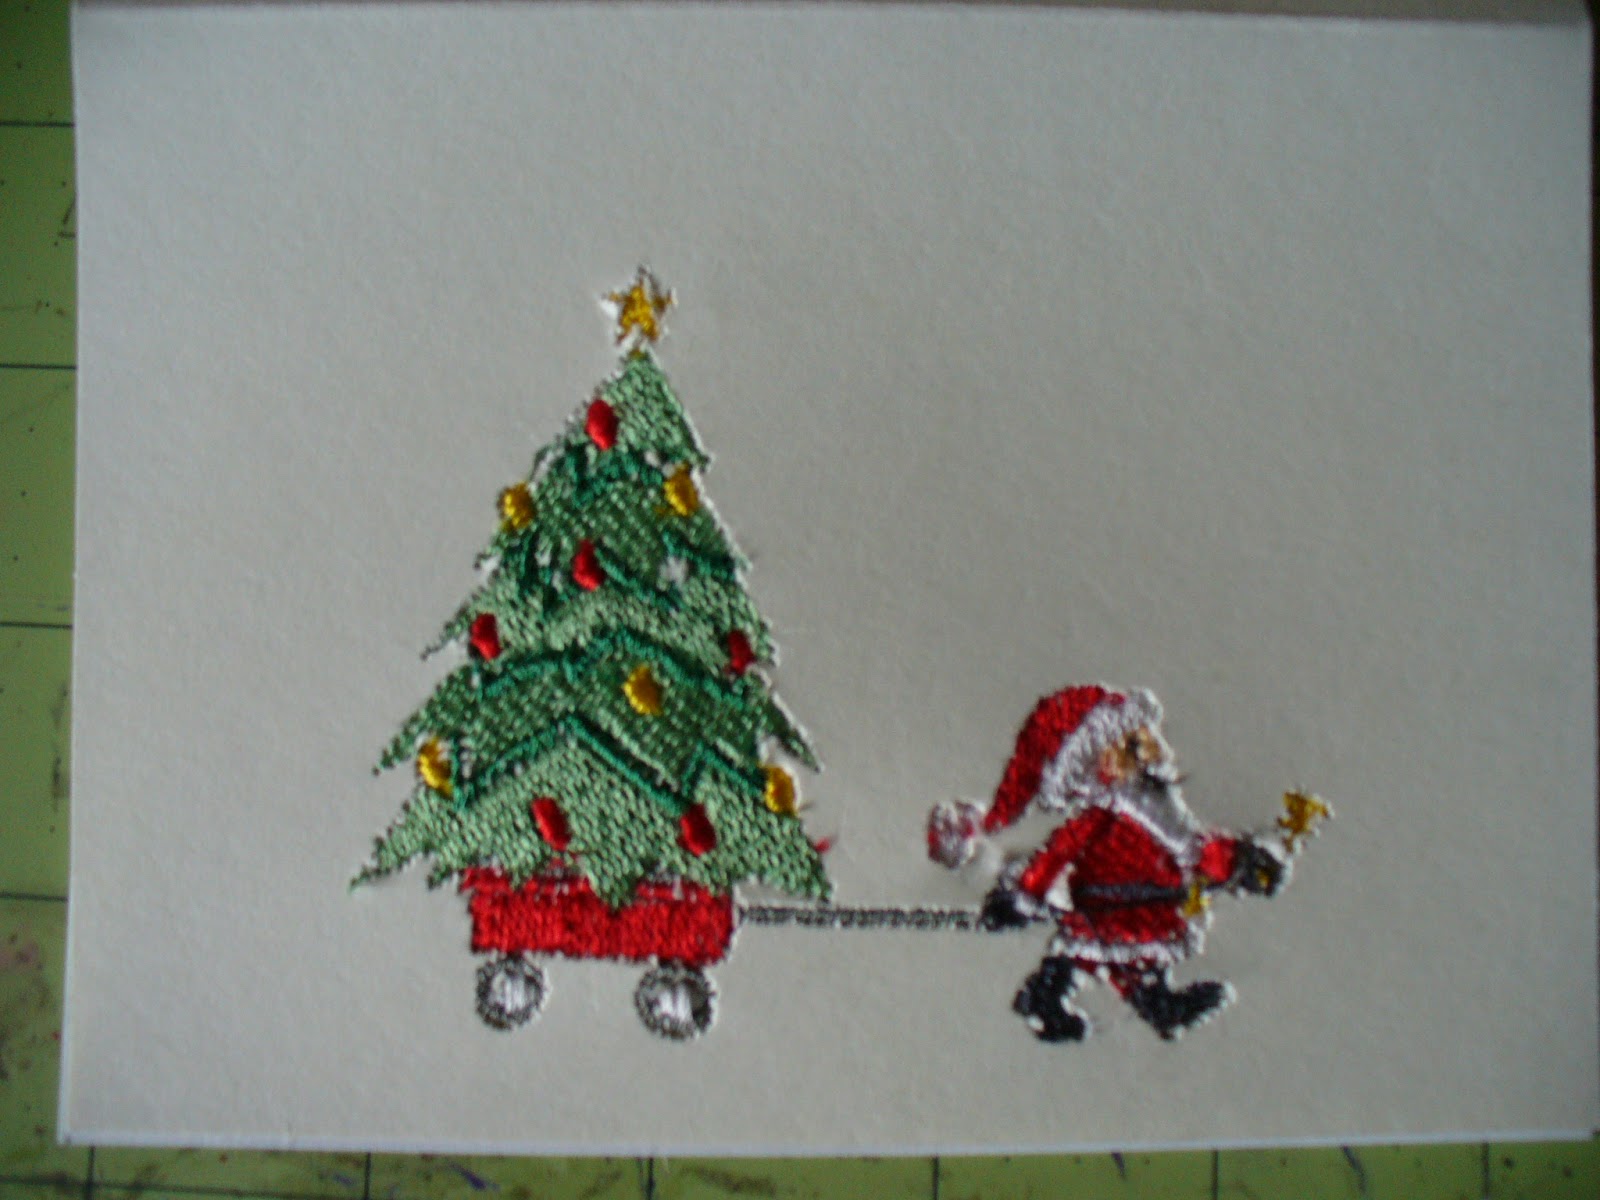
Machine Embroidered Christmas Cards


I recently gifted a friend with several Christmas machine embroidered cards. I used my Brother SE 350 embroidery/sewing machine. I bought the cards at Michaels to be used as bases. I do think better high quality cardstock with longer fibers, would have been a better choice, but I'm happy that what I did worked out.

Supplies:
4" x 5.5" cards that fit within my 4" x 4" embroidery hoop
Polymesh cut away embroidery stabilizer
505 Spray and Fix
Embroidery machine and hoop
Machine embroidery thread
Digital designs
         Use designs that are more open and not thickly stitched with fill for best results. There are designs online that have been digitized specifically for cardstock. Quick stitch designs are good for this. The one color redwork designs, with a low stitch count sew up really fast.

Hoop the stabilizer firmly and spray 505 inside where the stitching is planned. Press the inside flap of the card onto the stablizer.

Embroider the design using a size 11 or smaller sharp needle. The higher quality cardstock won't rip or tear, but the pack of cards I sewed, worked. The needle did cut through the cards, but I noticed that designs with less fill and coverage work best.

Following the embroidery, remove the stabilizer from the hoop and trim the excess away from the card.

Trim off all the jump threads.
To prevent the card's design from popping out and from showing the back of the design, cover the inside of the card with decorative printed paper.

Friday, July 13, 2012

Fashionable Greeting Cards

I was visiting Gingham Button2 in Palm Coast, Florida, when I noticed a sale going on. Well, I couldn't resist a sale on card making supplies, so I went over to look and fell in love with Kanban Crafts! At first I bought an assortment of pretty parts, but then I went back and bought the "Luxury Card Making Kit." This kit contains: 2 sheets of punch outs, 2 sheets of printed card stock, 1 sheet of gold card stock, e white cards ans 4 white envelopes and best of all instructions and photos of a variety of cards to make. From this kit, my pretty parts, papers and embellishments, I completed some truly high quality, handcrafted cards.


In November I'm going to be selling my crafts at a fundraising luncheon, that will include a fashion show. The cards should work well for that venue and catch the ye of shoppers! Check these beauties out, aren't they wonderful?